Ankle mobility exercises are essential for activities such as running, jumping, lifting, and performing almost any physical activity an individual is required to perform. Free and mobile ankle joint may have an added advantage in performance, will lower the chances of an athlete getting injured besides making the athlete more efficient in his movement. Here’s a comprehensive guide to ankle mobility exercises:
What You Need to Know About Ankle Mobility?
- Improves Performance: Frees athletic movements and tunes up strength training.
- Prevents Injuries: Helps prevent ankle sprains, shin splints, and knee injuries.
- Enhances Balance and Stability: With improved mobility, the balance that one gets is bound to be better, increasing overall stability.
- Facilitates Proper Movement Patterns: Promotes good and accurate biomechanics to avoid bad compensations.
Assessment of Ankle Mobility Exercises
Before starting exercises, assess your ankle mobility:
Knee to Wall Test: Stand parallel to a wall with your back facing the wall, extend your one leg at a distance of a few inches from the wall, and attempt to bring the knee touching the wall by bending the knee without letting the toe of the behind leg touching the wall, the behind leg remains flat on the floor. Take the distance from the outer part of the big toe to touching the wall. Typically, achieving a separation of 4-5 inches is practical as sufficient mobility.
Dorsiflexion Test: Stand up and sit on a chair; put a ruler on the ground and see how far you can bend your knee to touch your toes without touching the heel with your hand.
Stretches to Make Your Ankle More Flexible
1. Ankle Circles
- Stand with one leg on a step stool or a bench, or sit on a chair with one leg tucked under your body.
- Circle your ankle in the clockwise and counterclockwise direction 10 to 15 times.
- Make 10-15 circular motions clockwise for each ankle and the same in the counterclockwise direction.
2. Calf Stretch

- It is performed by standing with the right foot forward and the left foot backward close to the wall.
- Lock the back leg and ensure that the front knee is slightly bent.
- Contract your ‘‘core’’ by pulling your belly button towards your spine and pushing your hips forward for 20-30 seconds.
- Do 2-3 cycles for each limb.
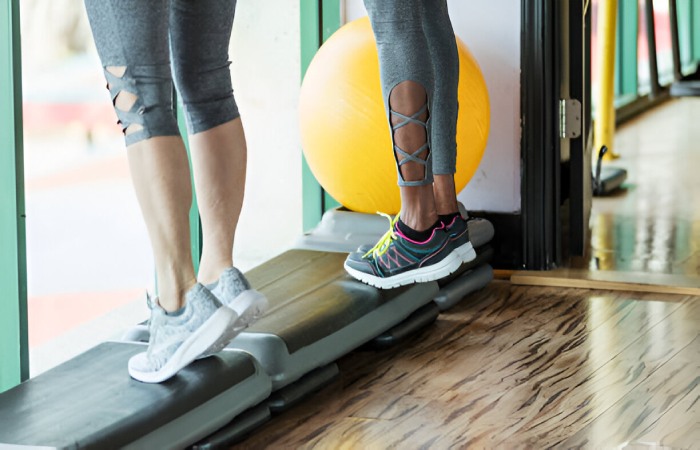
3. Heel Raises
- This body position can be described as follows: First, the patient should stand with their feet wider than shoulder-width but not more than hip-width.
- Lift your heels off the floor and keep it suspended for some time.
- Lower your heels as you slowly bring them back to the ground in a controlled motion.
- Doing pull-ups 15-20 times for 2-3 sets is recommended.
4. Toe Raises
- Bring your feet into a natural shoulder-width stance or a tad closer.
- Bend your right knee toward your buttocks while lowering your right toes toward the floor – do not let the heel touch the floor.
- Wait for a couple of seconds, and then lower your toes.
- One should repeat the motions about 15 to 20 times, which should be done in sets of 2 to 3.
5. Ankle Dorsiflexion Stretch
- Lie in a crawling position with the knees bent so that one knee will be forward, thus changing the position of the footrest three.
- Bend forward, continuing to press your knee over your toes.
- You should bend your knee and keep the heel flat on the ground, maintaining this position for 20-30 seconds.
- It is recommended to repeat it 2-3 times for each leg.
6. Band-Resisted Ankle Dorsiflexion
- Attach a resistance band to something stationary and wrap it around your lower leg and ankle.
- Bring your foot towards yourself, with your ankle bending.
- Gradually bring back your body to the position that it was before the squat.
- For the scapular stabilization, do 15-20 for 2-3 sets.
7. Foam Rolling

- Applying a foam roller on your calf muscles will help relieve tension.
- Perform the stressed rolling motion starting at the ankle and going up to the knee for approximately 1 to 2 minutes on each leg.
- If it is still tender to the touch following rolling, focus on the tight or sore areas.
8. Ankle ABCs
- Cross one leg over the other quickly and place the foot that is soaring in the air on the ground.
- Sweep the alphabet down the floor with the bottom of your foot, turning your ankle into a steering wheel.
- Run the alphabet from start to finish for each ankle, for a total of 26 letters.
Best Practices in Ankle Mobility Exercises
- Consistency: As for mobility, practice is the key in this sector. Instead, the frequency is used frequently as it is practiced consistently to be regarded as effective.
- Warm-Up: Before doing mobility exercises, you must always warm up.
- Progress Slowly: Gradually build up the type and length of exercise programs.
- Focus on Form: Caution to prevent possibilities of injuries during exercise and also to get the most out of the exercise.
- Listen to Your Body: As a rule, it is inadvisable to ‘muscle through the pain’; instead, constantly endeavor to change the set of exercises when feeling discomfort.
Conclusion
Therefore, integrating the listed ankle mobility exercises can help you boost your performance and minimize your risk of injury. Nonetheless, self-evaluate your mobility regularly and modify your exercises according to your advancements and requirements.


